
Streamline your Budget Tracking with iOS 17 Transaction Automations
iOS 17 and Bills to Budget bring Automations to budget tracking!
Recording your expenses isn’t always easy - grabbing a bite at the drive through or the coffee shop, you can easily forget to record it, and just go about your day. iOS 17 and the Shortcuts app comes with a hidden gem, however, that can really help - “Transaction Automations”, which can run a task every time you Tap to Pay with Apple Pay. And Bills to Budget makes it simple to use!
With the Bills to Budget Plus or Family Plus plans, you can create Spending Budgets to plan for your day to day spending, and the built-in Shortcuts commands make it easy to record a Budget Payment from Siri or from a more complex Shortcut - let’s walk through how we can take advantage of this with the new Automations.
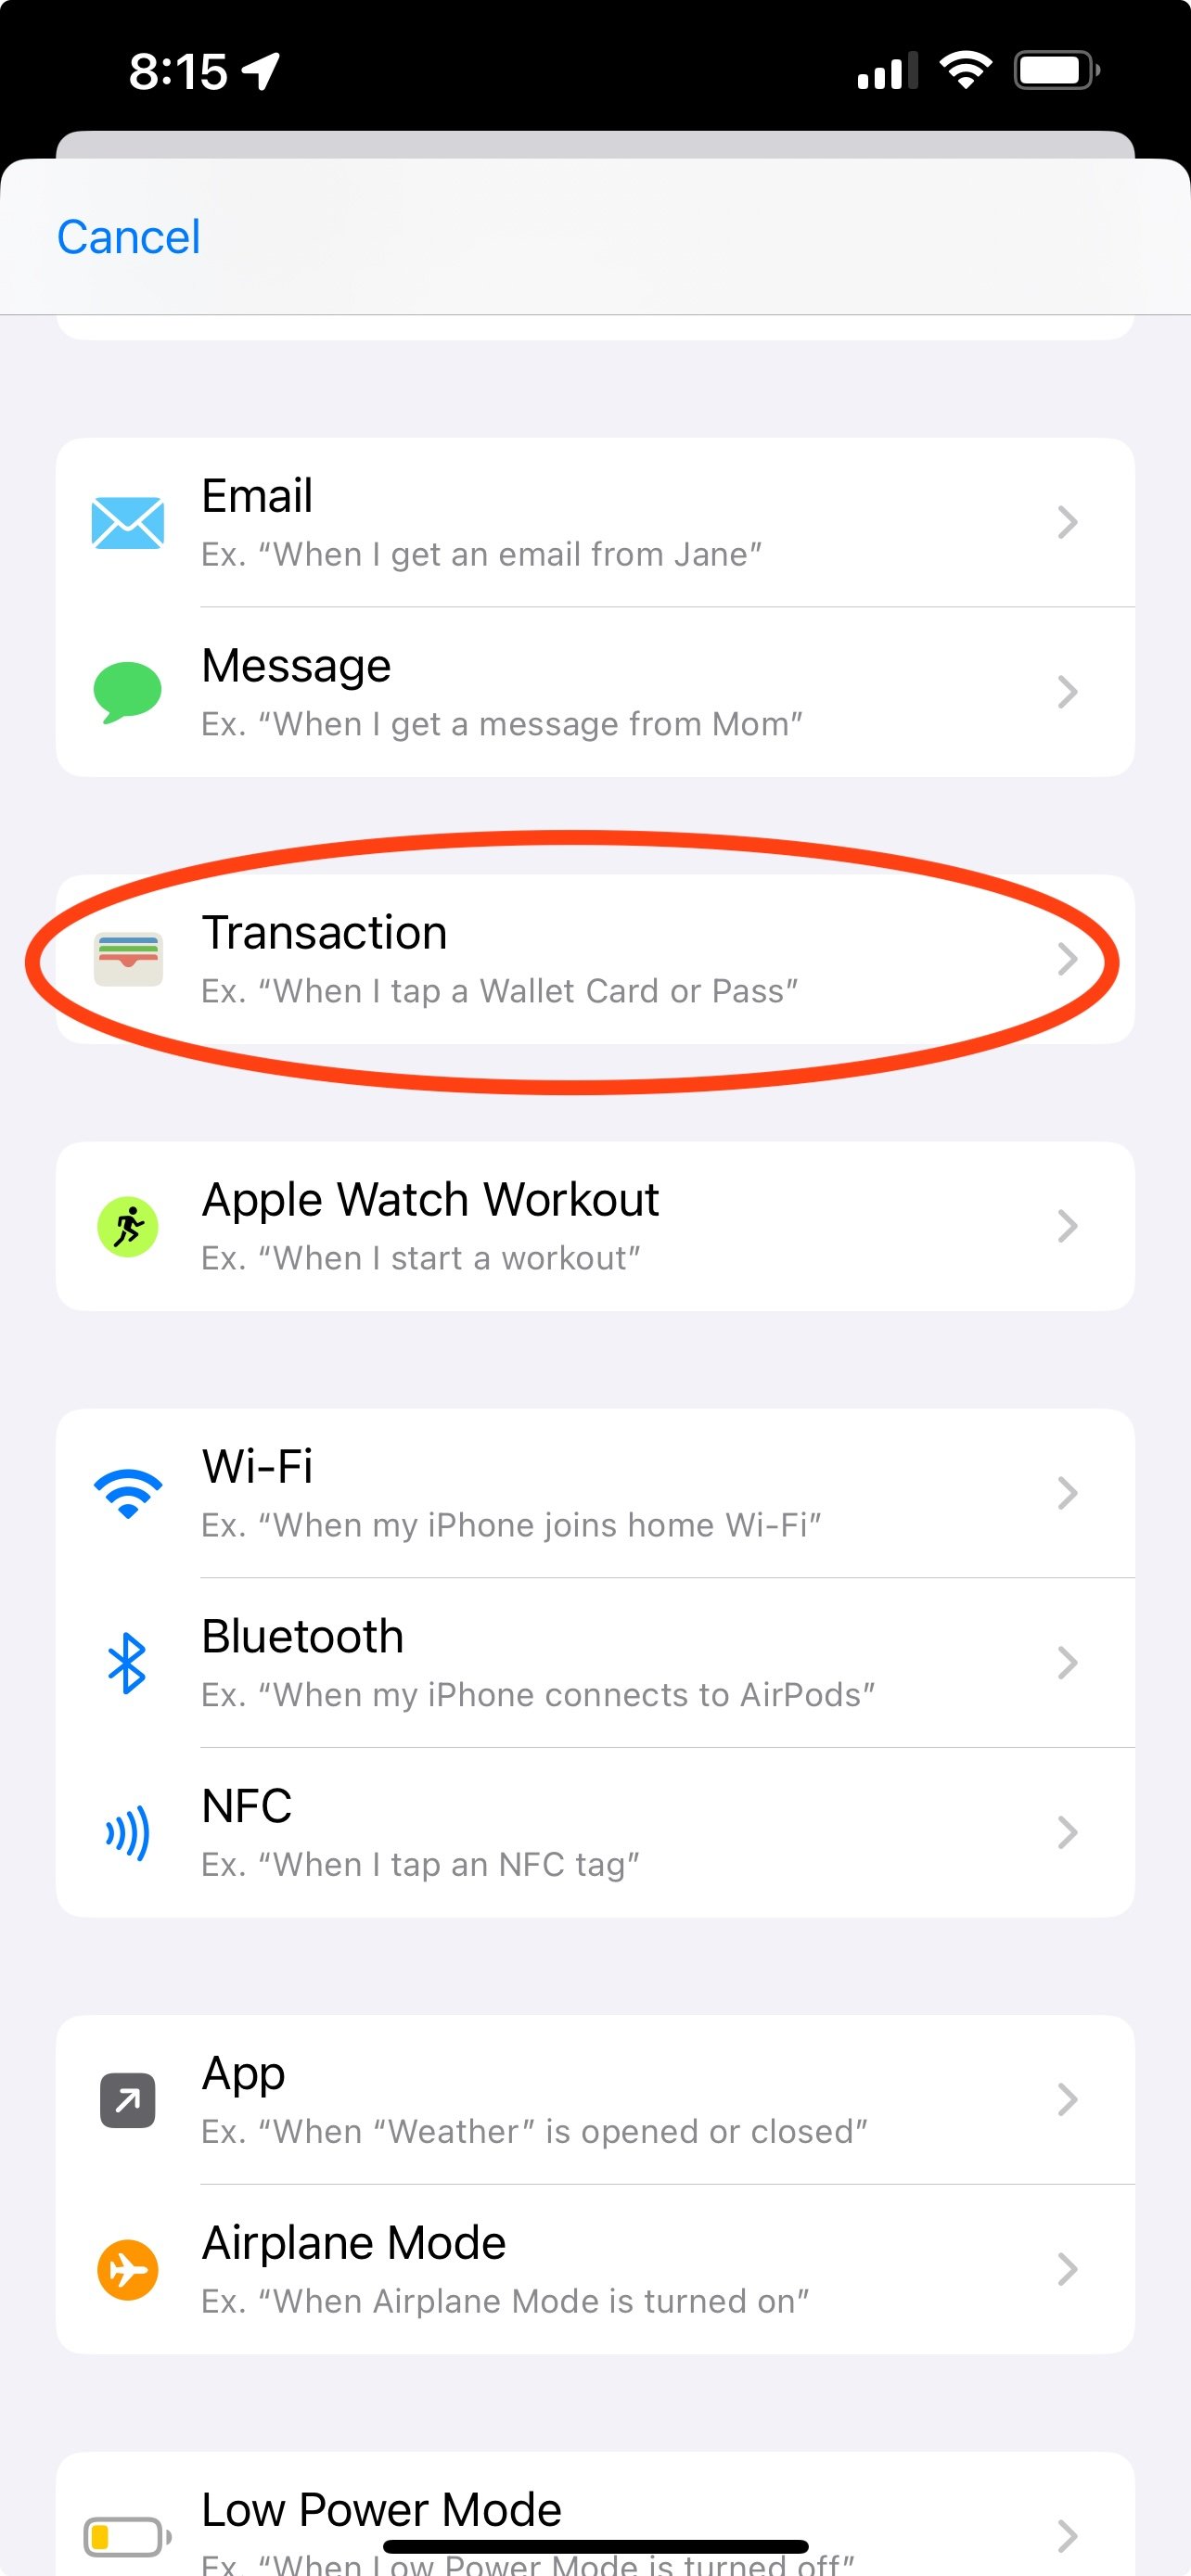
Assuming you have a Spending Budget already created, open the Shortcuts App (built in to iOS), and tap on the Automations tab. Scrolling down, you’ll find a new ‘Transaction’ automation - this is our starting point.
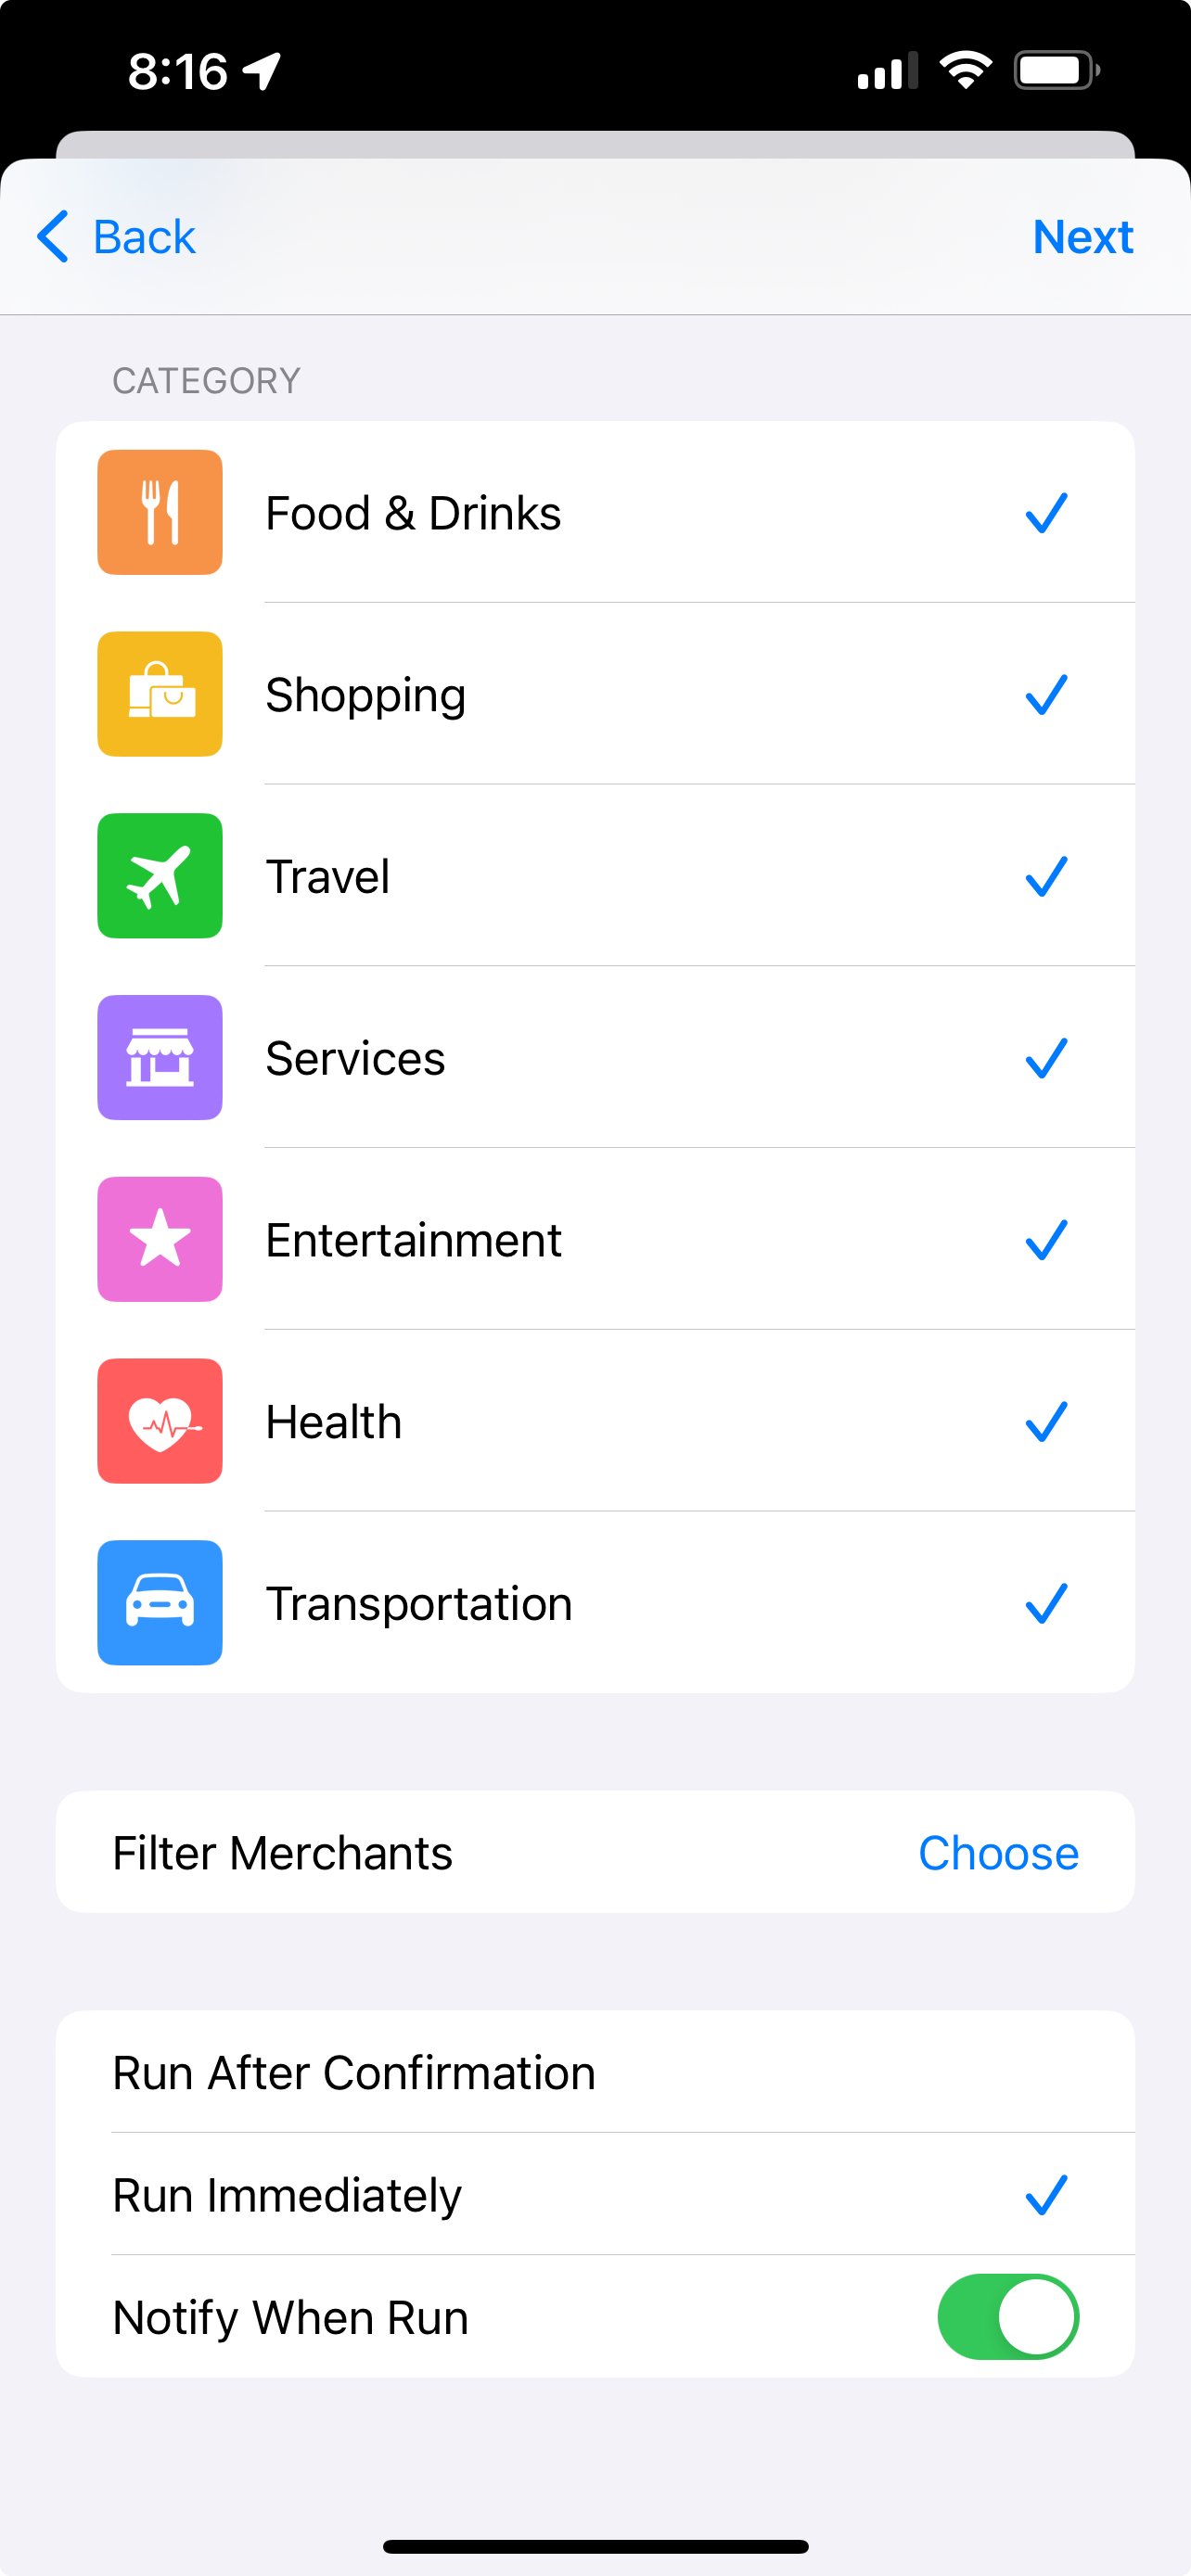
Tapping this will bring you to a screen that shows all of your Apple Pay cards a set of Categories, and a link to show Merchants (I’ve obscured most of my own cards here, but this should be familiar if you’ve used Apple Pay). As you can tell, this is highly customizable - I recommend starting by keeping things simple, and leaving everything highlighted, but you can experiment with what works best for you. For example, you could have different Cards or different Categories/Merchants (the stores you have shopped in) create Budget Payments against different Spending Budgets.
Before moving on, you’ll want to select ‘Run Immediately’, to ensure the action happens automatically, and I recommend selecting ‘Notify When Run’, which will show you a summary of a transaction when it happens (assuming you haven’t already put your phone in your pocket, of course).

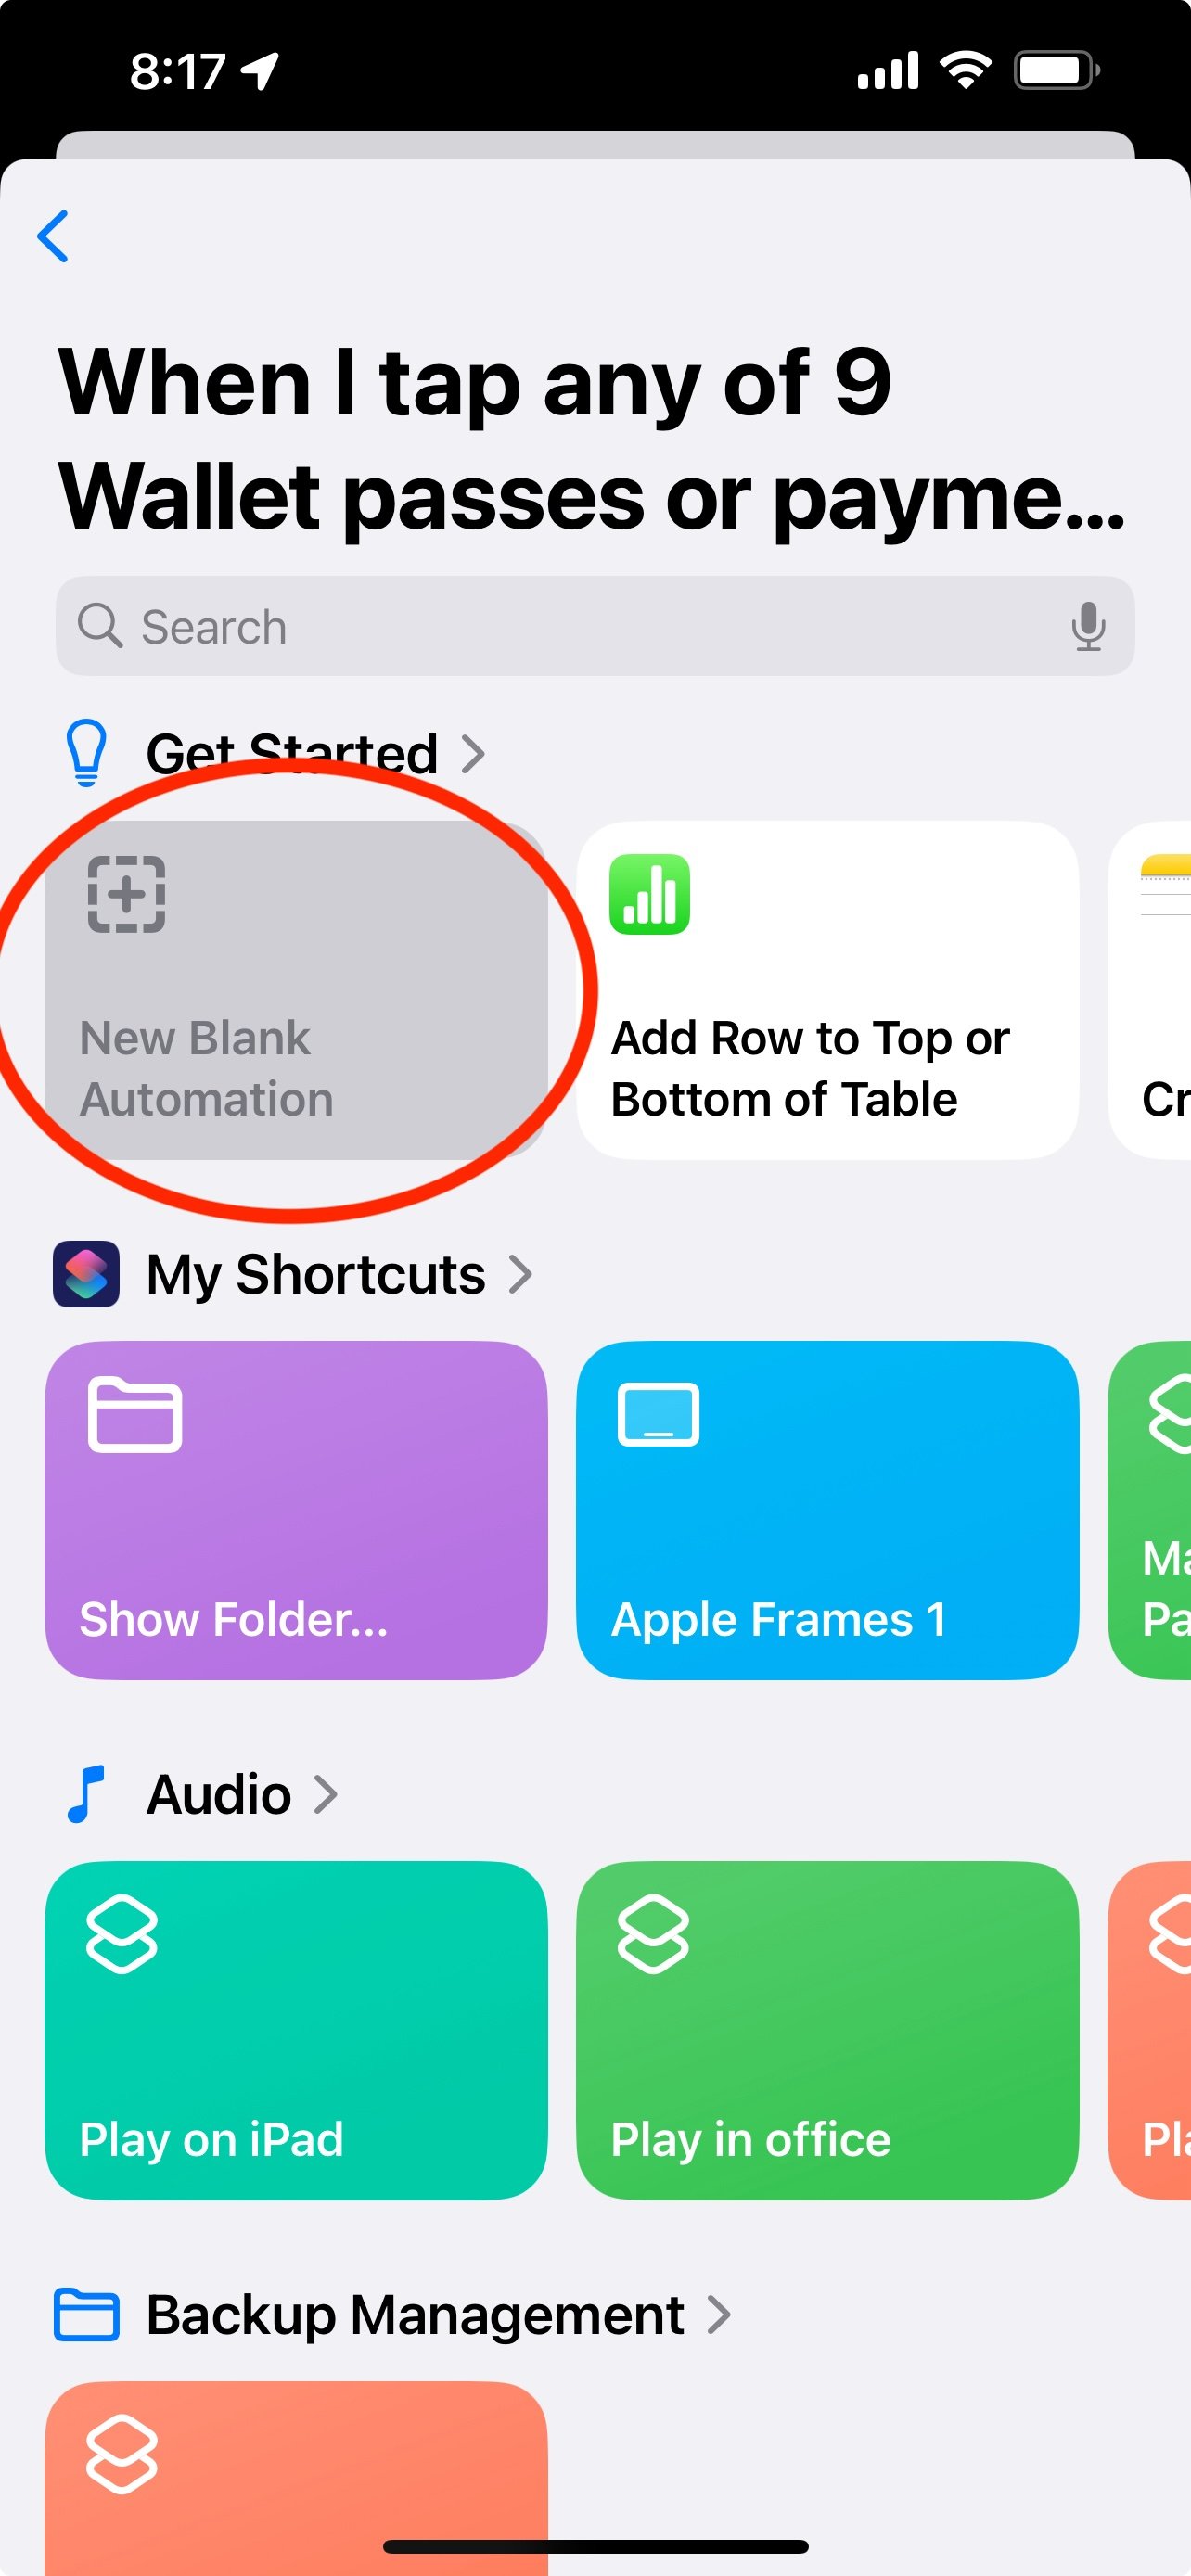
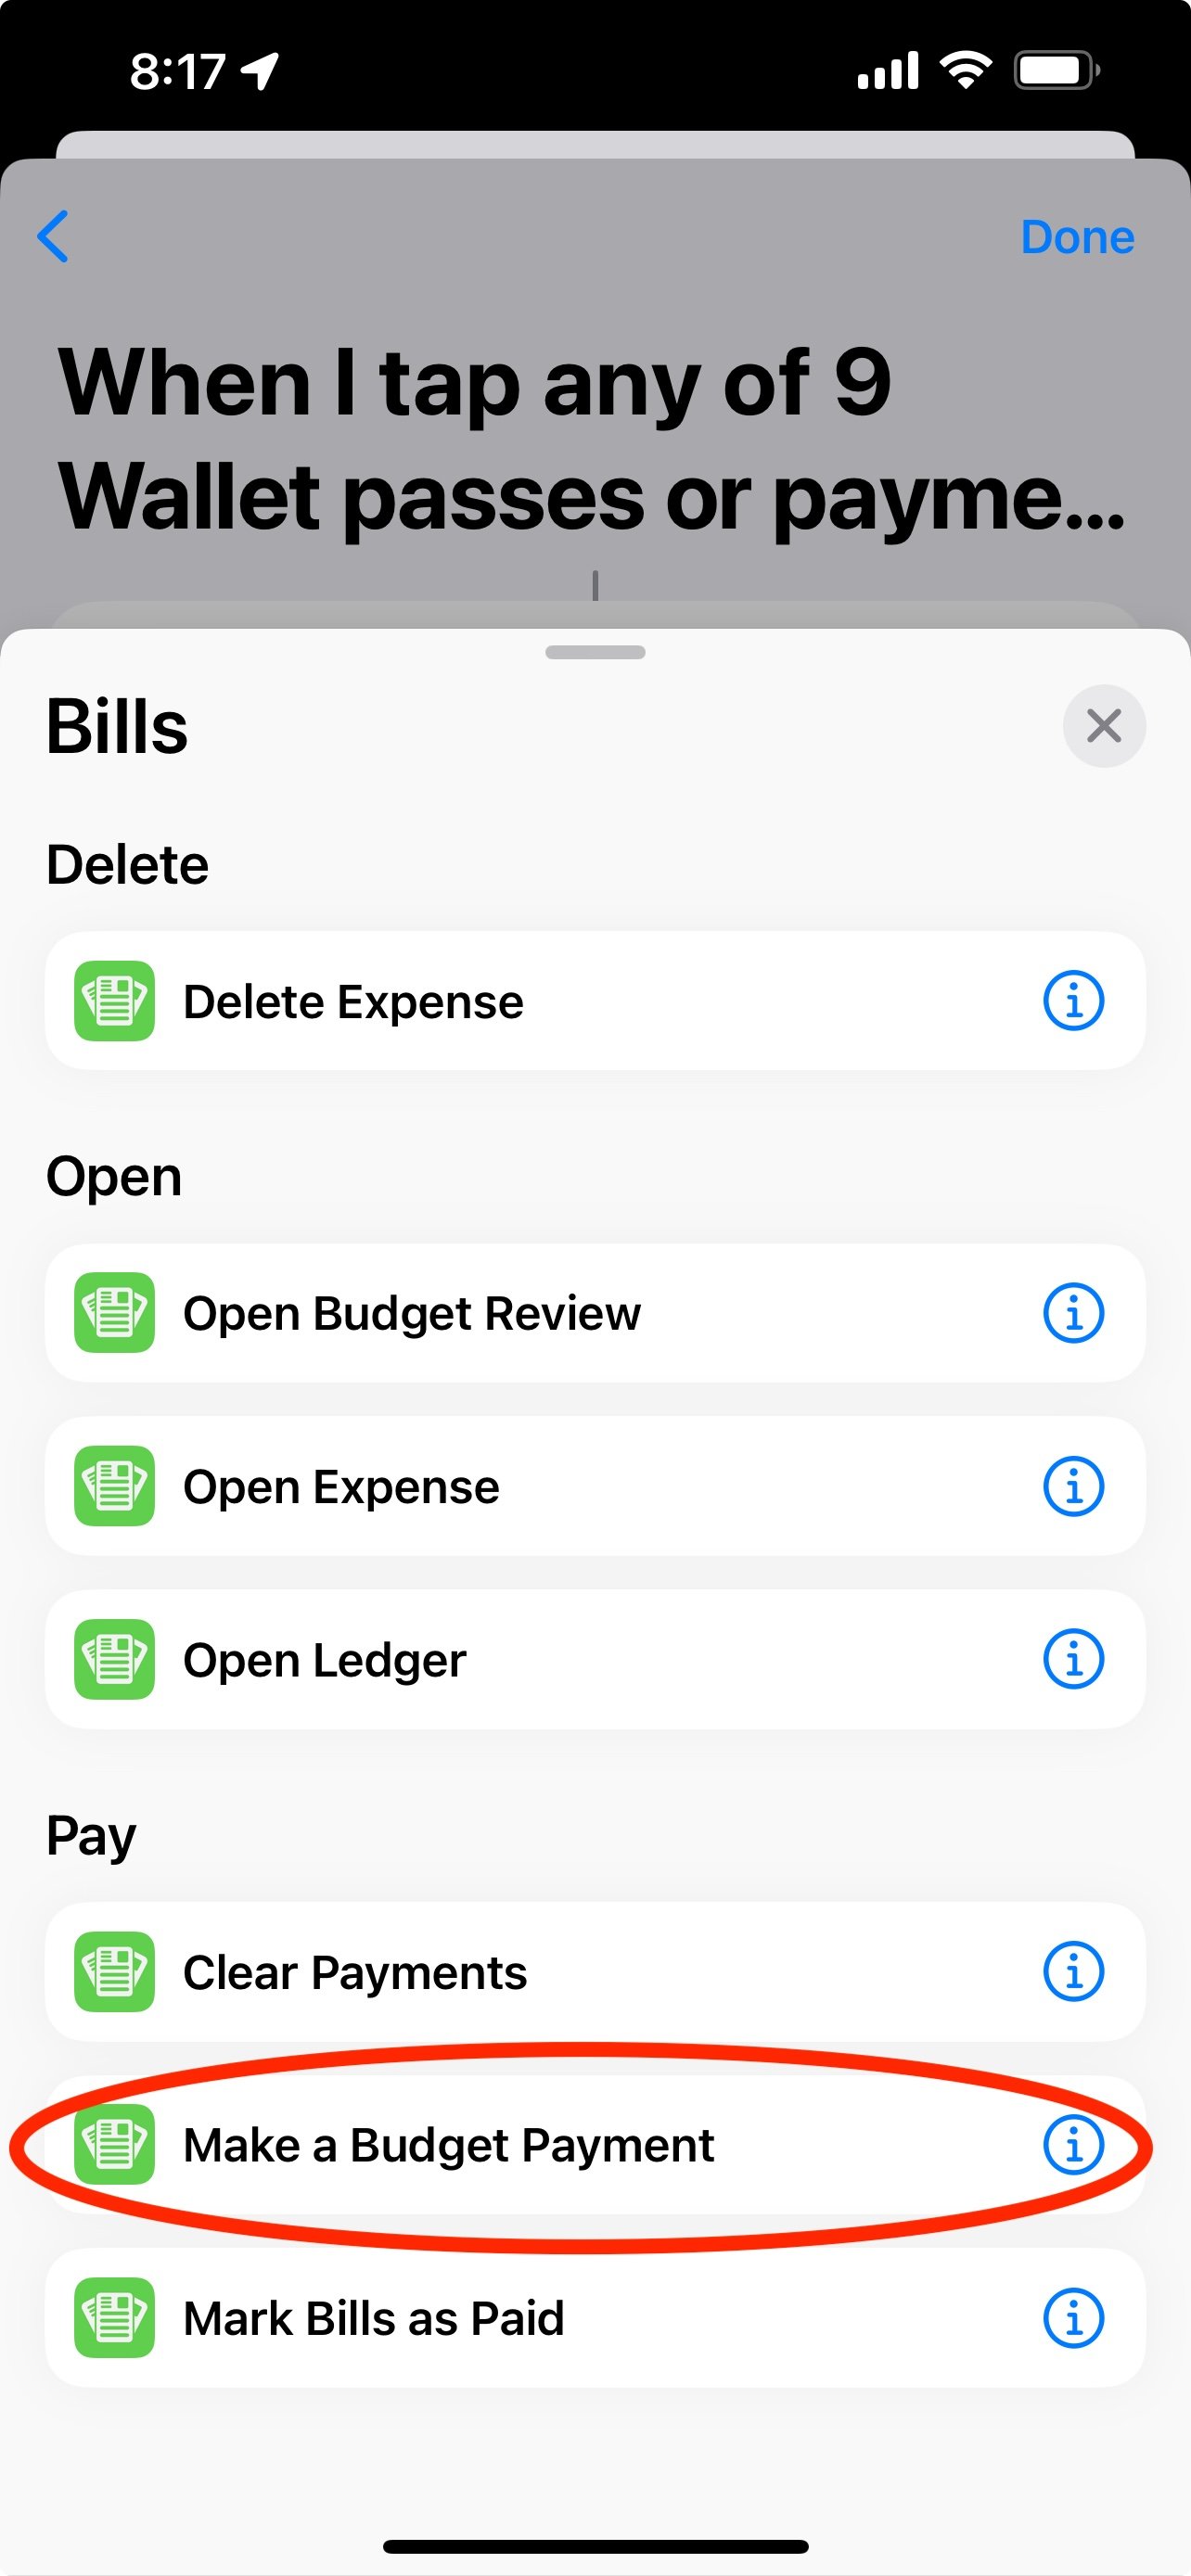
Great - now we have the Automation ‘Trigger’ created, let’s configure the Action. The next screen will show some suggested actions to take - tap ‘New Blank Automation’, followed by ‘Add Action’, and then select the ‘Apps’ tab. Find Bills to Budget in the list of apps (it will be just ‘Bills’ here), and then select ‘Make a Budget Payment’ from the list of Shortcut tasks that the app makes available.

Now it’s time to configure the Action itself - tap the right facing arrow to show more options, and then enable “From Wallet Automation”, to customize this action directly for our Automation. Select the Spending Budget you want to make the payment against, and then tap the “‘Amount’ from Automation” field - the next part is a bit unintuitive for the Shortcuts App, but if you scroll the slider just above the keyboard to the left, you will eventually find a ‘Shortcut Input’ option. Select this option, and then select it again to choose the field from the Input that you want use here - in this case, we want to select the ‘Amount’ field (see images for detail).
Finally, go through the same process to select the ‘Name’ value for the “‘Name’ from Automation” field, and then tap Done. And you’re all set! The next time you use Tap to Pay for a transaction, a payment will automatically be registered against your budget!


This is only a small piece of what the Shortcuts app can do, and Bills to Budget includes several actions that you can include in your automations, manually triggered Shortcuts, or can even be triggered with your voice using Siri.
Happy Budgeting!